

Hello everyone~! It feels like foreeeeever since I did a beauty-related post. I am so sorry! But since I finished my Study Abroad posts~ Today, I'm here to share with you not one, not two, but three different makeup tutorials in honor of Back to School Season! I am one of the luckier ones because I don't start my final year of undergrad until September 8th. So I decided to come up with 3 different looks that would work well for the infamous 1st Day of School.
If you are anything like me, I like to put in a lot of effort on myself for the first week back. My makeup, hair, and outfits just have to be on point. (I have a problem that if I'm not dressed for success during school, I just can't function Dx If you are like me, comment down below! :D) Because university life is extremely stressful for me every year, getting ready in the morning has become my favorite time of day. Having makeup on and wearing a cute outfits always make my horrible day better. :) So hopefully with these 3 different looks, your stressful day of school will get better as well. ^_^
Now each of these 3 looks are unique in their own way. The first is for those who...well...got so used to waking up late over the summer, that they kinda...sort of... overslept and is running late for their first day. (Trust me, I've been there) But that doesn't mean you can't look good for the day! Think of this tutorial as a 5 minute Get-Ready-With-Me. The second look is for those who have a decent amount of time to purty themselves up. Think of this tutorial as a 10-15 minute Get-Ready-With-Me. And finally, the third look is for those who have A LOT of time in the morning to get ready. Glam glam glam! Think of this tutorial as a ~30 minute Get-Ready-With-Me. :)
So without further ado, let's just jump right into the tutorials!
Makeup Look #1 | The "Oh God...Why did I wake up this late???" Tutorial

(I apologize in advance with the weird lighting for my photos. I'm still testing out my camera and finding what works best in whatever lighting is available for me >.<)
Products I Used in order of use:
1) Smith's Rosebud Salve
2) Maybelline Fit Me Concealer in 25 Medium
3) Innisfree No-Sebum Mineral Pact*
4) Canmake Quick Easy Eyeliner in 01
5) N.Y.C Eyelash Curler*
6) Too Faced Better Than Sex Mascara
* : Optional products
Note: Obviously you don't need these exact makeup products. Pretty much the main things you want for this tutorial is: Lip Balm (Tinted, if you'd like~), Concealer, Powder (though optional), Eyeliner, and Mascara (curler too if you'd want~).
Steps:

1) After the normal brushing of your hair and teeth, I'd recommend moisturizing. My skin tends to be a bit dryer when there's harsh sunlight outside and I'm sure you wouldn't want dry patches underneath the concealer you're about to put on. I recommend a light weight moisturizer such as Cetaphil or Simple. If you would like, I would also recommend putting on some sort of sunscreen. Although summer is ending, the sun will still be pretty harsh on your beautiful skin~ So safety first! After, apply some lip balm on your lips!
2) Now that you're skin is prepped, you could actually just end there if you don't have any time at all! As long as your skin is taken care of, you really don't need to go further, but if you are like me and just need some sort of makeup pick-me-up, then concealer is next!

I quickly just swipe the concealer under my dark circles in a triangle, and blend it out with a brush or my fingers. For those who have acne, redness, or discoloration, just put a little concealer over them imperfections, and blend blend blend!
3) Optional Step: Apply some powder over the concealer to set it for the day. I also recommend putting some on the forehead and nose. (Basically wherever you tend to oil up the most~)

4) Again you can end your routine at the concealer, but if you want some kind of definition to your eyes, use your eyeliner and create a thin stroke along your lashline. You don't need a wing or anything! Putting on some eyeliner (for me anyway) makes my eyes seem bigger and more wide awake~ If I just leave my face with just concealer, my face tends to look pale. D: So line them eyes baby!


5) Finally, just curl your lashes, or just apply your favorite mascara! Curling your lashes open up your eyes even more, but just applying mascara directly on your lashes without a curler is fine as well~ ^_^

And you're done!


*I apologize for the weird patchiness of my eyeliner. >< The one I have right now is SO DRY!!! And I haven't had time to get another one. (It was majorly hard to do all three tutorials with just this stupid liner. So I highly recommend NOT purchasing a Canmake liner. It's good for awhile, but once you start using it, it sucks.)

I know it may seem like a lot to do in the morning if you're rushing, but it's really simple and these steps don't take more than a minute each~ I think it's a really nice fresh-faced and natural look which still makes you look ready and wide-awake for that first day of school. :)
Makeup Look #2 | The "I have just the right amount of time to make myself pretty" Tutorial

Products I Used in order of use:
1) Smith's Rosebud Salve
2) Maybelline Fit Me Concealer in 25 Medium
3) Innisfree No-Sebum Mineral Pact
4) e.l.f Studio Eyebrow Kit in Medium
5) Urban Decay's Naked 3 Palette: Limited, Buzz, Nooner
6) Canmake Quick Easy Eyeliner in 01
7) N.Y.C Eyelash Curler
8) Too Faced Better Than Sex Mascara
9) Hourglass Ambient Lighting Blush in Diffused Heat
10) Maybelline Color Sensational Lipstick in 275 Crazy for Coffee
Note: Again, you don't need all these exact products. This tutorial is basically the same as the first except with just a few added products. Eyeshadow, an eyebrow kit, blush, and a lipstick!
Steps:
1-3) Same as the 1st tutorial! Moisturize, apply sunscreen, apply some lip balm, concealer, and powder~
4) Probably the hardest part of the tutorial... (for me anyway ><) the eyebrows~! I usually never do my eyebrows just because coughI'mlazycough and because I have full bangs so I find no point in doing my eyebrows when they're covered most of the time xD But for this tutorial, I attempted!


Basically just fill your eyebrows how you normally would~ Think of it as coloring in a coloring book. Stay within your normal brow shape, and don't fill the sparse patches too harshly! Natural will always be in style. ;) (brush them down too! >< I need to do some major grooming to them brows grr)
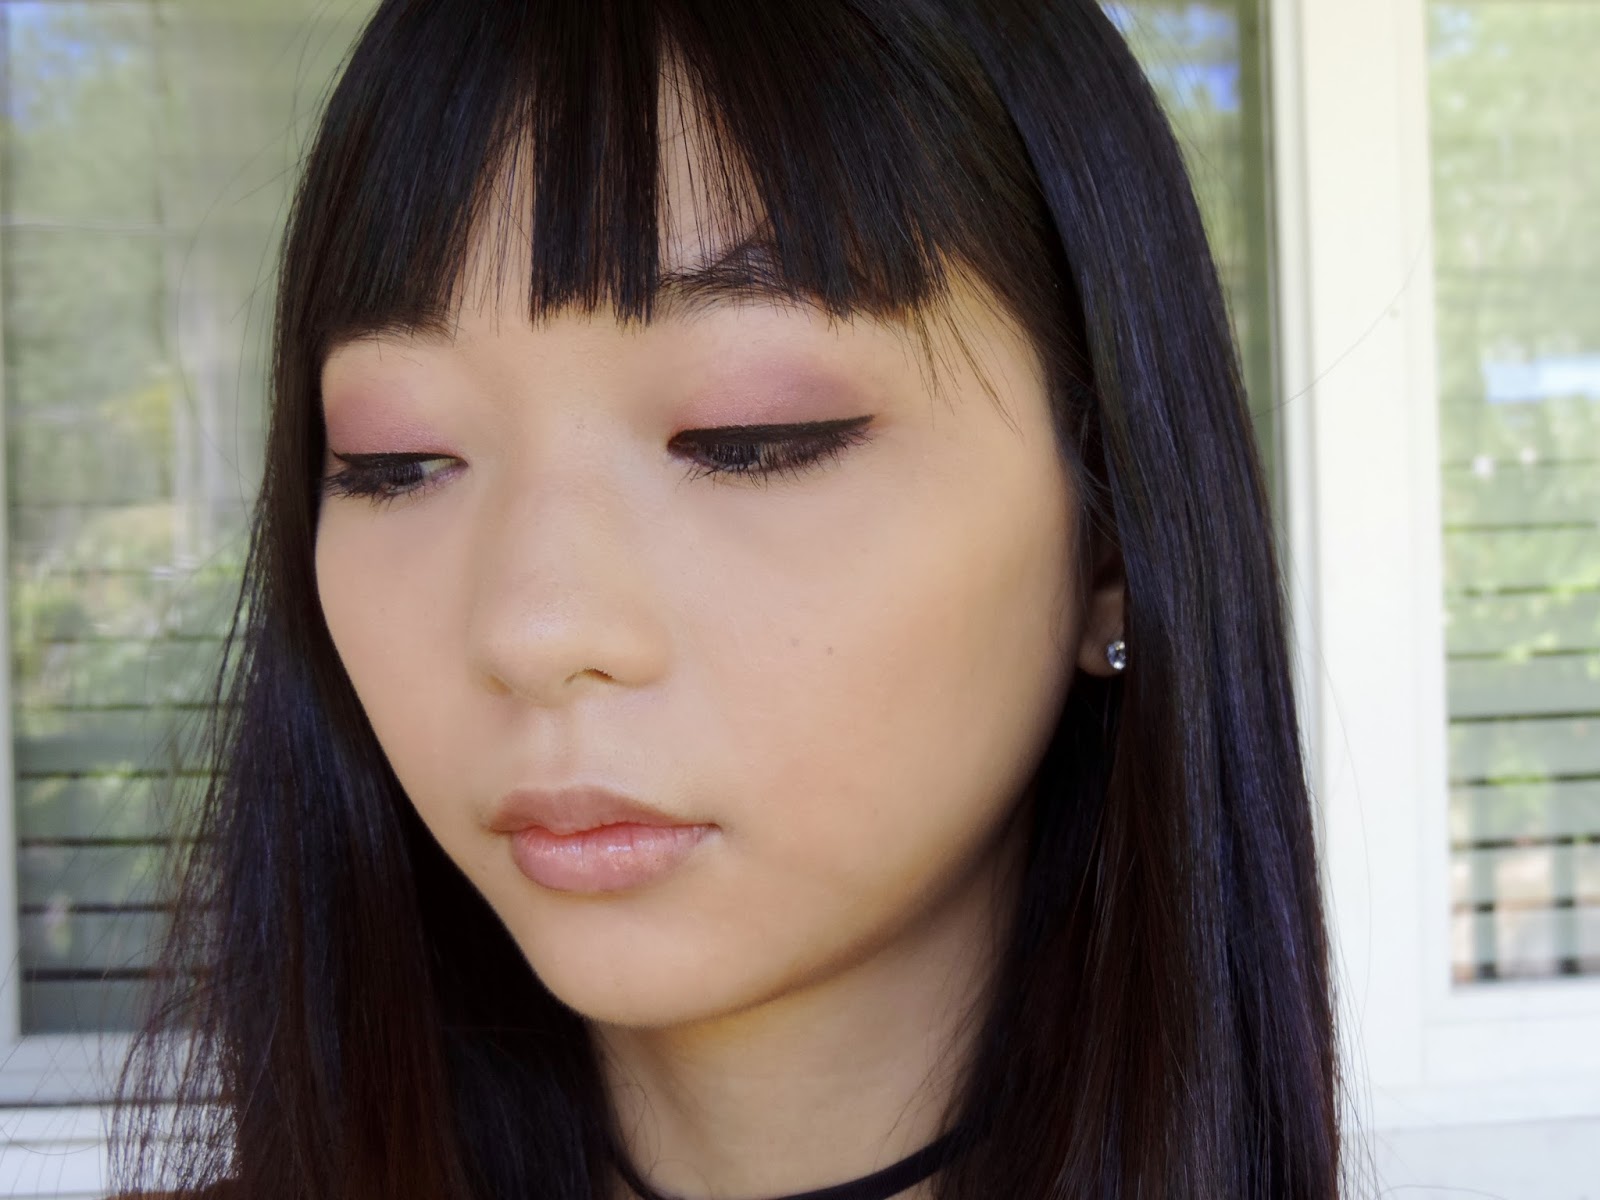
5) Now the best part, the eyes~ I loooove eyeshadows. In this look, I decided to go with something natural. Of course you can try for something bolder, but because this is just a 10-min or so tutorial, I just went with three colors from the Naked 3 palette.

First, I applied Limit in my crease. It is a matte light dusty rose color making it a good transition shade for the next two shadows.

Next, I applied the beautiful Buzz all over the lid. It is a metallic rose shimmer shade making it a good eye popper~
 |
| Oops..sorry for the different lighting!!! >< |
Finally, I used Nooner on the outer third of my lid to give my eyes some definition. Nooner is a pretty browny-pink matte which blends well with the 2 other colors.
Basically to create a natural eye look all you need is a good transition eyeshadow, a pretty all-over-the-lid color, and a darker eyeshadow for definition~ I went with Naked 3 because I love the pinks of this palette! It's so girly and cute and I just love it~ Hehe~ ^_^
6) Like before, apply some eyeliner~ Again, no need for a wing! If you have time though, go for it~ It can be a tiny one, just a flick of the wrist~ :)

7) Curl them lashes and apply your favorite mascara!


8) Time to give some color to your cheeks~ Smile, and using a light touch, add some blush to the apples of your cheek. You can bring up the color as well to the higher points of your cheek to give your face some definition. I chose not to do a bronzer for this look just because it's not necessary~
9) Finally, you can apply a MLBB (my lips but better) lipstick~ Or go for a brighter pop of color! Whatever you want! It's up to you! :D


And you're done! This is the look I wear 60% of the time in college! I always go for a more natural look because it's still school~ Unless it's a special occasion (or if I'm just bored.. ><) I tend to stray away from dramatic looks. One, I just don't have enough time in the morning to do something crazy, and two, although I do love me the smokey-eyes, dark/bright colors, and full-on glam looks, I'm still shy when it comes to other people seeing me with it on my face. xD But because it's my last year at undergrad this year, I'm definitely going to try this 3rd Tutorial a lot more~ ;)
Makeup Look #3 | The "I will be a QUEEEEEN for the 1st Day of School" Tutorial


*The lighting for these pictures are so off. I'm sorry D:
Products I Used in order of use:
1) Smith's Rosebud Salve
2) Berrisom My Lip Tint Pack in Bubble Pink
3) e.l.f Mineral Infused Face Primer
4) Tarte Rainforest of the Sea Foundation in Light-Medium Neutral
5) Tarte Rainforest of the Sea Concealer in Light-Medium
6) Innisfree No-Sebum Mineral Pact
7) e.l.f Studio Eyebrow Kit in Medium
8) Urban Decay All Nighter Makeup Setting Spray
9) Urban Decay Naked 3 Palette: Limit, Buzz, Nooner, Factory+Mugshot, Dust, Strange
10) Marc Jacobs Beauty Highliner Gel Crayon in Black
11) Canmake Quick Easy Eyeliner in 01
12) Urban Decay Naked 3 Palette: Darkside, Mugshot, Buzz, Dust
13) Stila Glitter Eyeliner in Kitten
14) Fake Eyelashes (Sorry...I don't know which ones these are ><)
14) N.Y.C Eyelash Curler
15) Too Faced Better Than Sex Waterproof Mascara
16) Makeup Revolution Ultra Blush Palette in Hot Spice - Bottom Matte, Top Baked
17) Marc Jacobs Beauty Le Marc Lip Creme in 216 Kiss Kiss Bang Bang
18) Urban Decay All Nighter Makeup Setting Spray
Note: Haha~ Obviously to be a Queen you must use a lot of different products~ ;)
Steps:
1) Apply your moisturizer, sunscreen and lip balm!
2) I decided to apply my Berrisom Lip Tint in Bubble Pink~ For those who don't know what that is, it is basically just a peel-off lip stain! You apply a thick layer of product all over your lips and leave it to dry. Once it has, you peel it off and you should be a left with a budge-proof pinky stain~ I'm applying it early on because I'll be doing the rest of my makeup while it dries~ (It may look weird, but it does stain my lips really well~)

 |
| Hehe...oops, didn't see that strangling piece of hair on my lip >< |
3) Primer time! I'd like my makeup to last a bit longer on my skin, so I used a nice silicone-based primer. It evens out my kinda bumpy skin texture, along with helping my face makeup to last a bit longer than usual.
4) Ah~ Foundation. I'm usually not a fan of foundation. >< I hate the way most foundations feel on my skin. I absolutely HATE makeup products where I feel like there's something on my face to be honest. But the Tarte Rainforest of the Sea foundation is really light weight. Maybe because it's a water-based foundation~ I don't know~ But I like it! I just apply one-pump, not too much~ (Mainly because I honestly really don't need foundation since my skin is pretty nice-looking already). Then I just blend it out!
5) Concealer comes next~ I matched the foundation with it's concealer match. Not too sure how I like the Tarte Rainforest of the Sea concealer. It does its job fairly well, but it smells like I'm applying paint on my face. Dx The worst smelling concealer I've ever used.

6) Powder comes next to set everything in place! If you would like, you can even bake! I unfortunately don't have my go-to baking product (e.l.f High Definition Powder) with me currently, so I just settled with regular translucent powder.
7) Eyebrow time~ Like before, fill them in however you'd like~
8) Because my skin usually looks a bit dry at this point of the makeup routine, I use the Urban Decay setting spray to bring back some moisture to my face~ (Fun Fact: I tried this makeup product a couple of years ago, but kept returning it because I never liked it. Now, I really do~ I'm not too sure if it makes my makeup last longer, but I really love how it gives my skin moisture without ruining what I've already done to my face)

9) My favorite part, the eyeshadow~

I started with Limit in my crease. Like before this matte light dusty rose color, is a good transition color for the other shades.

Next, I applied a bit of Buzz, the metallic rose shimmer, on the center of my lid. Along with Liar, the satin mauve, on the outer third of my eye.

Then I mixed Burnout, a satin pink, and Dust, a metallic pink glitter, on the inner third of eye.
10) After that's done, tightline your eyes with a black (or brown if you want more natural) pencil eyeliner. I got this Marc Jacobs one in my Sephora birthday gift and I kinda like it~ I love how it's a gel formula, so the product is oh-so creamy~ It hasn't smudged on me yet since I've used it, but I'm still testing it out!
11) After tightlining, apply your regular liquid eyeliner. Now for this look, you can go full-on wing! I still have not mastered the ways of a really good wing for monolid eyes, but I'm still practicing!

12) After that, I added a mix of Mugshot, a metallic taupe-y color, and Darkside, a deeper taupe-y color on the outer 1/3 of my lid over my liner to deepen the look.

On the bottom lashline, I used Dust on the inner corners and Darkside on the outer corners.
13) On top of Dust, I apply a glitter eyeliner to the inner corners of my eyes to make it pop even more! I absolutely LOVE Stila's Kitten! It's just the most beautiful glitter I've ever owned~ I don't even know how to describe its color. It's like a bronze with rose gold shimmers. It's just so beautiful~ A perfect color for a Summer going into Fall!

14) Next, I apply some false lashes~ I rarely ever wear fake eyelashes, but this pair is really natural on my eyes, and I can even wear them with my glasses! ^_^ This is an optional step however~
15) Whether you applied fake eyelashes or not, use your curler and curl them lashes~ And apply your favorite mascara as well. I just bought the Too Faced Better Than Sex Waterproof Mascara and OMG I'm in love~ The regular version has been my favorite since I got a sample of it for my birthday last year, and I've been wanting the waterproof version since it came out! It is really wet, so I have to make sure it dries before I mess around with it, but it is seriously budge proof. I love it so far!

16) Now I just have to apply my blush, bronzer, and highlight. One of the shades in the Makeup Revolution palette works well for me as both a blush and a bronzer. Instead of putting it on the apples of my cheek like normal, I apply it more around the hollows of my cheeks. It still gives me a nice pinky glow while simultaneously framing my face~ I then use one of the baked shadows as a highlight~

17) By now, the Berrisom Lip Tint is dry so I peel it off~ Of course you can just leave it as is, maybe just add some lip balm on top of it, but I like to add a lipstick on top of it~ Kiss Kiss Bang Bang is the most BEAUTIFUL dusty rose color I've ever had on my lips. The lipstick is just so creamy and pigmented and just amazing. I'm seriously debating whether to buy the full version once I run out of the mini one, but it's really expensive so we'll see ><


18) And finally, use the setting spray again to lock in the look~!

A lot went into creating this last look, but you'll look so BOMB when you're finished~ Haha xD I've been using this look a lot actually during the summer just because I have a lot of time to play around with my makeup products~ It's a really nice look to play around with, especially with the eyeshadows, and I hope people try it out!

 |
| I need a better eyeliner to fix that ugly fake eyelash glue thing =.= |
Now enjoy some more back to back pictures of these 3 looks! :)
 |
| Look #1 |
 |
| Look #2 |
 |
| Look #3 |


It was incredibly fun making these 3 different looks! They are all really similar to each other, but I wanted to show you guys that no matter how much time you're given in the morning, you are always able to become presentable with a few simple steps~ x3
Stay tuned for more of my little Back to School themed posts! ;) We are not done yet~~~
Until next time,
Be true and always be you,
Love, Aimee
Follow me or come talk to me on:

I love all three makeup looks *O* I really like your second look! I was pleasantly surprised to see that we use some similar products (Rosebud salve, concealer, and tint) :D Thank you for sharing your amazing looks :D
ReplyDeleteJessie @ Bijou-Heart